YouTube Videos: Know All About Camera Angles and Filming Before You Shoot Them
Many ‘experts’ will tell you that YouTube is all about content, and if you have amazing content ideas related to your brand, you’ll be able to make the most out of it. However, presentation is just as important as the content, and if you don’t present your content properly, you can’t expect more than a few YouTube views. Even the blandest of content can be made to look incredible if you know the right camera angles and a few filming techniques to use.


If you don’t have a lot of technical know-how regarding camera angles and filming, read on to know how putting in a bit more thought and effort can transform your YouTube videos.

Why are camera angles and proper filming important?
Correct filming techniques and appropriate camera angles are of immense importance, especially if you’re creating a tutorial, product unboxing, and product review videos. Combined with the lighting, they can draw viewers’ attention towards you and whatever it is that you want to get across to them.
Without them, your videos will only be mere shadows of what they could have been. In an age where so many YouTubers are investing in high-quality cameras, you just can’t afford to get left behind, especially if you’re operating in a niche that already has many competitors.
While deciding on the angles and filming techniques that work best for you can be a time-confusing affair, you shouldn’t skip it just to save some time. The time you put into experimenting and understanding them can help you identify numerous things you can do to improve your content-creating skills.


The coolest thing is that once you figure out what’s right for you, it can become your signature way of filming, adding to your channel’s uniqueness. And you know how YouTube works, right? The more unique your content is, the better your chances are of reaching out to your target audience and gaining more YouTube subscribers.
Different camera angles and their uses
- Eye-level: If you want to come across to your viewers as someone friendly and trustworthy, it’s best to set your camera up at eye level. When you use this angle, you won’t be required to look up or down to communicate with the viewers (read on for low and high angles) and this can be strangely comforting. The ‘eye level’ angle isn’t just a favorite for YouTubers but is also used by presenters across educational videos, documentaries, and news broadcasts.If it’s a tutorial or product review video that you’re making, you should ideally work with the eye-level camera angle and combine it with side angles. Placing the camera at eye-level and a side angle can often work wonders, especially if you want your viewers to think of you as an expert. People who look straight into the camera lens are generally news anchors and/or actors in advertisements, which involve auto-cue reading.
- High angle: A high angle isn’t the ideal angle, simply because it may make your audience feel that you are inferior to them. Doesn’t make much sense? Well, unfortunately, that’s how the human mind works. It’s mostly because using such an angle would require you to look up at the camera to make eye contact with your viewers.Of course, don’t be afraid to use high angles to film some portions of your video just to add some minor variations. A slight change in the camera angle from time to time can make your video entertaining to watch, but don’t stick to it throughout the entire length of it.
- Low angle: The low angle is the complete opposite of the high angle, i.e. you need to look down towards the camera to face your viewers. Again, this isn’t the ideal angle as your viewers may feel overwhelmed. Filmmakers tend to use low angle shots when they want their audiences to feel small, vulnerable, and/or threatened.Videos involving celebrated public figures are often shot using this angle and it might make sense for you to use it when your channel garners several thousand real YouTube subscribers. Feel free, however, to experiment and incorporate low angle shots for the sake of breaking the monotony of your video.
Filming techniques and practices for fantastic videos

- The right shot: We’ve covered the various angles you can experiment with, but once you figure out the angle that works best for you, it’s time to get the shot right. The shot you choose will dictate how far the camera is from you and how much it will capture within a frame.For example, if the video is supposed to feature only you and not much else, the close shot would be your best choice. However, if you’re collaborating with a fellow YouTuber and/or have multiple things to focus on in your video, it’s better to opt for a medium shot. Wide shots are meant for videos where you want both yourself and your environment to be in the frame. For example, cooking channels on YouTube mostly rely on wide shots to cover both the cook and the kitchen environment.Just as you would do with angles, go ahead and experiment with different shots to determine which one you’d predominantly like to use. Using different shots in the same video is also not a bad idea, but it’s recommended not to mix and match too much as it may become uncomfortable for your viewers.
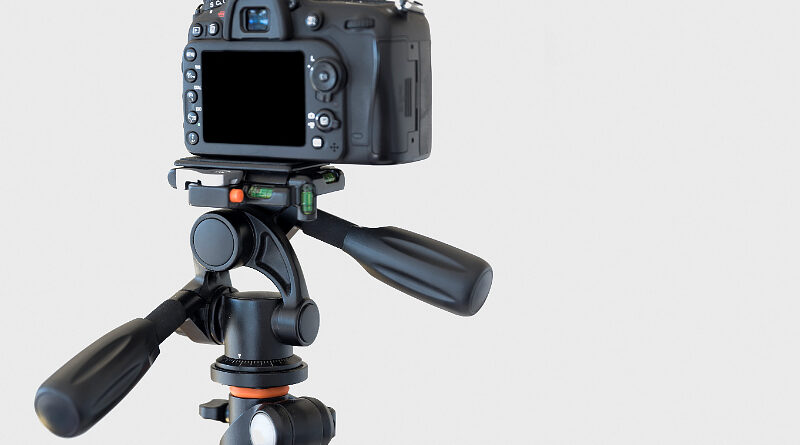
- Crystal-clear sound: Using a high-end DSLR for filming your videos guarantees compelling visuals, but if you rely on its audio-recording capabilities to record whatever you have to say, it’s a big mistake! If your viewers can’t hear you loud enough and there’s too much background noise, they’ll be very quick to look for another video.So when you’re filming your video, ensure that you’re doing it in a quiet place. If you’ve got the money, you can invest in soundproofing panels that’ll ensure that your recording space is free from unwanted external noises and sounds.You should also invest in audio gear such as a microphone and an audio interface. Recording on a microphone via an audio interface guarantees crystal-clear sound quality. Audio production software allows you to add effects such as reverb and compression to make your audio louder and you can use video production software to put your video and audio together.
- Chalk it all out: This isn’t a filming technique, but it’s a practice that you should develop if you’re keen on making your brand visible and likable on YouTube. Chalking it out involves writing down all your video ideas on a piece of paper so that you can give it some structure.From organizing the sequence of events featured in the video to assigning different shots and angles for all of them, you can make it as detailed as you want. Having it all mapped out before you start filming can save you a lot of stress, as otherwise, you’d be constantly juggling between filming one section and thinking what to do next.Rehearse your parts as well. While you don’t need to learn anything by heart, rehearsing your parts can give you a lot of confidence during the filming process. The last thing you’d want is to shoot a certain part over and over again just because you fail to find the right words.
- Be patient: Again, this is more of a practice than a technique, but one that can prevent you from getting frustrated. If you’re filming an elaborate video with lots of talk and multiple camera angles and shots, it’s going to take some time and you have to accept it.If you’re not patient and end up hurrying your video, it’ll ultimately cost you as hurried productions simply don’t have the look and feel to them that patiently made videos do. Speeding through the production process may also lead to errors in syncing your video and audio, which will make your video look even more unprofessional.
Lighting
We mentioned lighting once before in this post, and we’re including a small section here just to emphasize its importance in making YouTube videos. Proper lighting will ensure that all the things in the video you want your viewers to give attention to are visible without any hint of darkness. Lighting options range from the pocket-friendly to the expensive. If you’ve just started your YouTube channel, you should ideally invest in affordable lighting solutions. If your channel grows over time, feel free to purchase more high-end equipment.
Some of the lighting options popularly used by YouTubers include LEDs, ring lights, and reflectors. LEDs offer great portability, ring lights work wonders when it comes to close shots, and reflectors can be used to soften direct light.
We’ve come to the end of the post and we hope that by learning from what we’ve shared with you, you can help your YouTube channel experience sustained growth. Making your videos top-notch both visually and sonically is the most basic step you can take to market your brand well, so put in as much effort as you possibly can.